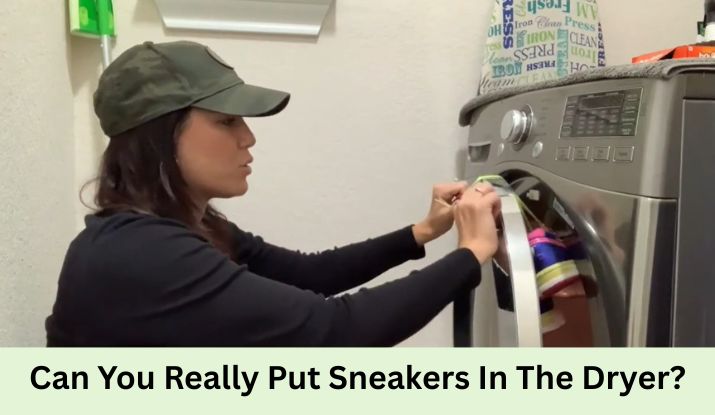
Yes, you can put sneakers in the dryer on the lowest heat setting for brief cycles, but experts strongly advise against it for most pairs to avoid permanent damage like warping, shrinking, or weakened adhesives.
Drying sneakers after a sudden downpour or a muddy hike often feels like a race against time, especially when you’re eager to wear them again. Many people wonder if tossing them into the dryer is a quick fix, but the reality involves more nuance than a simple yes or no. The heat and tumbling action can compromise the materials that make your favorite kicks durable and comfortable.
This guide dives deep into the dos and don’ts, drawing from expert insights and practical tests to help you decide. Whether you’re dealing with canvas high-tops or knit runners, understanding the process ensures your sneakers last longer without unexpected mishaps. Let’s explore safer paths forward while addressing when the dryer might actually work.
The Hidden Dangers of Dryer-Drying Sneakers
High heat in a dryer doesn’t just evaporate water—it can fundamentally alter your sneakers’ structure. The adhesives holding soles to uppers often melt or separate under temperatures above 120°F, leading to a floppy fit that no amount of glue can fix. Fabrics like mesh or canvas might shrink unevenly, creating tight spots that rub blisters into your feet during runs.
Beyond physical changes, the constant thumping against the drum wears down padding and stitching over repeated uses. Leather elements, common in premium sneakers, crack and stiffen from rapid moisture loss, turning supple material brittle. Even seemingly harmless low-heat cycles add up, shortening the lifespan of insoles that already trap sweat and grime.
Manufacturers like Nike emphasize these risks, noting that wet shoes left untreated breed mold anyway, but dryers accelerate wear far worse than natural evaporation. The takeaway? Convenience comes at a cost, and spotting early signs like a musty smell means it’s time to pivot to gentler methods. By prioritizing airflow over heat, you preserve the investment in your footwear collection.
Sneaker Materials and Dryer Compatibility: What Fits and What Doesn’t
Not all sneakers react the same to heat and motion, so material matters immensely. Canvas models, like classic Converse, tolerate low-heat drying better than synthetics, but even they risk color fading after a few rounds. Knit uppers in modern runners absorb water deeply, making uneven drying a prime culprit for puckering.
Leather and suede demand extra caution, as heat draws out natural oils, leaving them prone to splits. Rubber soles, while heat-resistant, can deform if the shoe’s core shifts. Always check care labels—many brands stamp warnings against machine drying to void warranties on damaged pairs.
To clarify compatibility, consider how each component responds. Foam midsoles compress under pressure, losing bounce, while metallic accents might tarnish from humidity swings. Testing on a single pair reveals tolerances, but pros recommend erring on air-drying for irreplaceable styles. This approach keeps your rotation fresh without frequent replacements.
| Sneaker Material | Dryer Compatibility | Key Risks | Recommended Alternative |
|---|---|---|---|
| Canvas | Moderate (low heat only) | Shrinking, fading | Newspaper stuffing + fan |
| Knit/Mesh | Low | Uneven drying, puckering | Air dry in ventilated area |
| Leather/Suede | Avoid entirely | Cracking, oil loss | Room temperature air dry |
| Synthetic/Rubber | Low to moderate | Deformation, glue melt | Silica gel packets |
| Foam Midsole | Avoid | Compression loss | Dehumidifier setup |
This table highlights quick-reference choices based on common constructions, helping you assess before loading the machine.
Step-by-Step: Safely Using the Dryer for Sneakers (Last Resort Only)
Step 1: Inspect and Prep the Sneakers
If air drying isn’t feasible due to a tight schedule, proceed with utmost care to minimize harm. Start by inspecting the care tag—if it screams “air dry only,” heed it to dodge warranty issues. Remove insoles and laces first; these extras prolong drying and can tangle, blocking airflow.
Step 2: Secure for Suspension
Tie the laces into a secure knot and drape them over the dryer door, shutting it to suspend the sneakers mid-air. This prevents banging against the drum, which could dent the machine or scuff soles. Select the air fluff or no-heat cycle if available.
Step 3: Run a Short Cycle
Running for no more than 10-15 minutes before checking progress. Post-cycle, reshape by hand and stuff with dry towels to absorb residual dampness. Repeat sparingly, as cumulative exposure builds stress on seams.
Step 4: Add Protective Buffers
For added protection, enclose in a mesh laundry bag lined with old towels—they cushion impacts and wick moisture. Monitor for hot spots, as uneven heat distribution spells trouble for delicate panels. Even with these precautions, limit dryer use to once every few months.
Step 5: Finish and Inspect
The method suits emergencies, like prepping for an event, but habitual reliance invites costly repairs. Pair it with spot-cleaning to tackle stains without full immersion, extending overall freshness.
Top Alternatives: Fast, Damage-Free Ways to Dry Sneakers
Air drying reigns supreme for preserving sneaker integrity, relying on natural evaporation enhanced by simple household tweaks. Place pairs in a well-ventilated spot, like near an open window, with toes elevated on a rack to let gravity pull water downward. Loosen tongues and prop sides open, allowing breeze to circulate freely without direct sun exposure that bleaches dyes.
For quicker results, incorporate absorbent fillers like crumpled newspaper, swapping sheets every couple of hours until dry to the touch. This old-school hack pulls moisture from interiors where it hides longest, preventing that clammy feel on first wear. Avoid glossy pages to sidestep ink transfers on light fabrics.
Fans accelerate the process dramatically, mimicking a gentle wind tunnel without thermal risks. Position sneakers equidistant from the blades, soles facing the flow, and run on medium speed for 2-4 hours depending on saturation. Hang by laces from a rod if space allows, ensuring even exposure that cuts drying time in half compared to still air.
Silica gel packets, those tiny saviors from shoeboxes, pack a punch for enclosed drying. Stuff a handful into each shoe alongside removed insoles, sealing in a paper bag overnight for discreet absorption. They’re reusable after sun-baking, making them eco-friendly for frequent rain-dodgers.
Dehumidifiers shine in humid climates, pulling ambient moisture to speed evaporation indirectly. Set sneakers nearby on a mesh shelf, combining with a fan for hybrid efficiency that rivals commercial dryers sans damage. These methods not only safeguard materials but also neutralize odors brewing in damp crevices.
| Drying Method | Time Estimate | Cost | Effectiveness for Wetness Level | Best For |
|---|---|---|---|---|
| Air Dry (Ventilated) | 12-24 hours | Free | Light to moderate | All materials |
| Newspaper Stuffing | 6-12 hours | <$1 | Moderate | Canvas/knit |
| Fan Circulation | 2-6 hours | Free (if owned) | Moderate to heavy | Runners/trainers |
| Silica Gel Packets | 8-12 hours | $5/pack | Moderate | Leather accents |
| Dehumidifier | 4-8 hours | $50+ (unit) | Heavy | Humid environments |
Comparing these options reveals tailored fits, balancing speed with sneaker health for optimal outcomes.
Pre-Drying Essentials: Cleaning Sneakers to Lock in Freshness
Dirt and salt from streets amplify damage if dried in place, so a thorough clean sets the stage for success. Begin with a soft brush to dislodge loose debris, focusing on treads where grit accumulates like tiny saboteurs. Spot-treat stains with a mild solution of dish soap and warm water, dabbing rather than soaking to avoid excess moisture.
For machine-safe pairs, a gentle cycle in a pillowcase protects against fraying, using cold water to preserve colors. Rinse twice to flush residues that could crystallize and etch fabrics. Extract water via spin only—no heat—to prep for drying without reintroducing grime.
Hand-washing suits delicates, employing a toothbrush for crevices and baking soda pastes for scuffs. Dry laces separately by hanging, as bundled they slow the whole process. This ritual not only hastens evaporation but embeds hygiene, warding off bacteria that thrive in overlooked folds.
Post-clean, inspect for wear—frayed edges signal when to retire a pair, preventing further unraveling during drying. Integrating this step transforms maintenance from chore to ritual, keeping sneakers looking sharp season after season.
Busting Myths: What Not to Do When Drying Sneakers
The internet buzzes with hacks that sound genius but spell disaster for your soles. One persistent tale touts rice bowls for overnight absorption, yet fine grains often embed in linings, abrading interiors over time. Kitty litter fares worse, leaving chemical residues that irritate skin through breathable meshes.
Ovens at low temps promise speed, but enclosed heat warps midsoles irreversibly, turning supportive cushions into flat pancakes. Microwaves? A fire hazard waiting to spark, as metallic eyelets ignite sparks amid uneven zaps. Hair dryers on high mimic these woes, scorching exteriors while cores stay soggy.
Sunbathing on sills fades vibrant hues and brittles synthetics, a slow killer for collector editions. These shortcuts stem from impatience, ignoring how gradual drying maintains molecular bonds in glues and fibers. Stick to vetted tactics, and your sneakers thank you with resilience.
Debunking extends to “just once won’t hurt”—cumulative micro-damages accumulate, halving longevity per expert wear tests. Educating on realities empowers smarter choices over viral pitfalls.
Proactive Protection: Keeping Sneakers Dry from the Start
Waterproofing sprays create invisible barriers, repelling rain without altering breathability if applied in thin layers post-clean. Test on inconspicuous spots first, as oversaturation stiffens uppers. Reapply quarterly, especially before wet seasons, to fortify against puddles and splashes.
Storage savvy matters too—elevate pairs on shelves away from floors, using silica pouches to combat closet humidity. Rotate wears to allow full dry-outs between uses, preventing chronic dampness that fosters mildew. Boot trays with drainage catch indoor drips, channeling moisture harmlessly.
For adventurers, gaiters or overshoes shield during hikes, while urbanites opt for quick-dry liners that wick sweat proactively. These layers of defense reduce drying frequency altogether, preserving vibrancy and structure. Investing upfront in prevention multiplies enjoyment, turning potential headaches into non-issues.
Frequently Asked Questions
What Happens If Sneakers Go In The Dryer?
Putting sneakers in the dryer exposes them to tumbling and heat that can warp shapes and weaken glues. Canvas might shrink slightly, while leather cracks from lost oils, leading to discomfort. Always check for separation after, and reshape immediately to minimize issues.
For best results, limit to low-heat cycles under 15 minutes. This preserves fit and function better than high settings, which bake in odors too. Brands like Adidas warn against it for warranty reasons, so air-dry when possible for longevity.
Best Practices For Sneakers In The Dryer
Follow best practices for sneakers in the dryer by removing insoles and laces first, then suspending by laces on the door. Use air fluff or low heat for 10-15 minutes max, with towels inside to buffer impacts. Check midway to avoid over-drying.
This keeps materials intact and prevents machine damage. Post-dry, stuff with paper to hold form. It’s a rare-use tactic—combine with cleaning for fresher results every time.
Risks Of Putting Sneakers In The Dryer
Risks of putting sneakers in the dryer include adhesive melt, fabric shrinkage, and sole deformation from heat over 120°F. Tumbling frays seams and compresses foam, cutting cushion by up to 30%. Bacteria can thrive in unevenly dried spots too.
Opt for alternatives to dodge these, saving on replacements. Quick checks post-cycle spot early damage, but prevention beats fixes.
Safe Alternatives To Sneakers In The Dryer
Safe alternatives to sneakers in the dryer start with fan-assisted air drying, which cuts time to 2-4 hours without risks. Stuff with newspaper for moisture pull, or use silica packets overnight for discreet results. Dehumidifiers work wonders in humid spots.
These methods maintain shape and breathability better. They’re free or low-cost, ideal for daily care routines.
How Long Do Sneakers Take In The Dryer?
Sneakers take 10-20 minutes in the dryer on low heat, depending on wetness—light dampness needs less. Always pause to check, as knit types dry slower than canvas. Exceed 20 minutes at your peril, risking heat buildup.
Pair with air finishing for full dryness. This balances speed and safety effectively.
Materials That Handle Sneakers In The Dryer Best
Canvas and synthetic mesh handle sneakers in the dryer best, rebounding from low-heat tumbles with minimal shrinkage. Rubber soles pair well, flexing without cracks if cycles stay short. Avoid leather, which brittles easily.
Test a pair first to confirm. This guides quick decisions for urgent dries.
Tips For Sneakers In The Dryer Without Damage
Tips for sneakers in the dryer without damage include mesh bags with towels for cushioning and no-heat settings only. Remove extras and reshape right after. Limit to emergencies to avoid wear.
These keep your kicks looking new. Regular air-dry habits complement perfectly.
Why Avoid Heat When Drying Sneakers In The Dryer
Avoid heat when drying sneakers in the dryer because it softens glues and shrinks fibers unevenly, leading to poor fit. Cool air evaporates moisture gently, preserving flexibility. Studies show it ages materials twice as fast.
Switch to fans for similar speed sans harm. Your sneakers stay comfy longer this way.
Maintaining Shape After Sneakers In The Dryer
Maintaining shape after sneakers in the dryer means stuffing with socks or trees immediately, then air-propping for 24 hours. Massage uppers to even out tucks. This counters compression effectively.
Rotate pairs to reduce dryer needs. It’s key for lasting form.
Common Mistakes With Sneakers In The Dryer
Common mistakes with sneakers in the dryer involve high heat, overloading, or skipping prep, causing melts and tangles. Ignoring labels voids warranties too. Always suspend and time short.
Learn from these to protect investments. Better habits mean fewer toss-outs.
Conclusion
Navigating the world of sneaker drying boils down to informed choices that honor both haste and longevity. While the dryer offers a tempting shortcut, its pitfalls—from adhesive failures to fabric woes—outweigh conveniences for all but the rarest scenarios. Embracing alternatives like fans, absorbents, and vigilant air setups not only safeguards your pairs but elevates routine care into a satisfying craft.
As weather patterns shift and adventures beckon, these strategies equip you to keep steps light and sure-footed. Prevention through sprays and smart storage further cements habits that extend joy per stride. Your sneakers, after all, carry stories—treat them to endings as epic as the miles ahead.
Ultimately, the best dry is the one that whispers rather than shouts, preserving the quiet confidence in every lace-up. Dive into these practices, and watch your collection thrive through seasons untold. Here’s to dry soles and boundless paths.